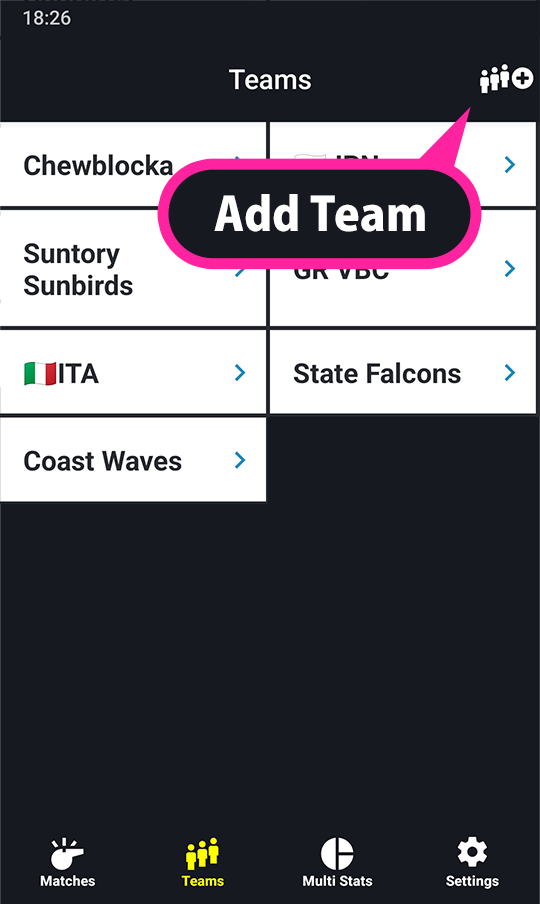
Open the team list from the Teams menu at the bottom of the app. You can add a team using the button in the top right corner of the page.
If this is the first time registering a team, add it as a main team.
For your own team or teams you are familiar with, we strongly recommend setting player names (display names) on the player page after adding the team.
For display purposes, shorter names are generally preferred.
Sub-teams
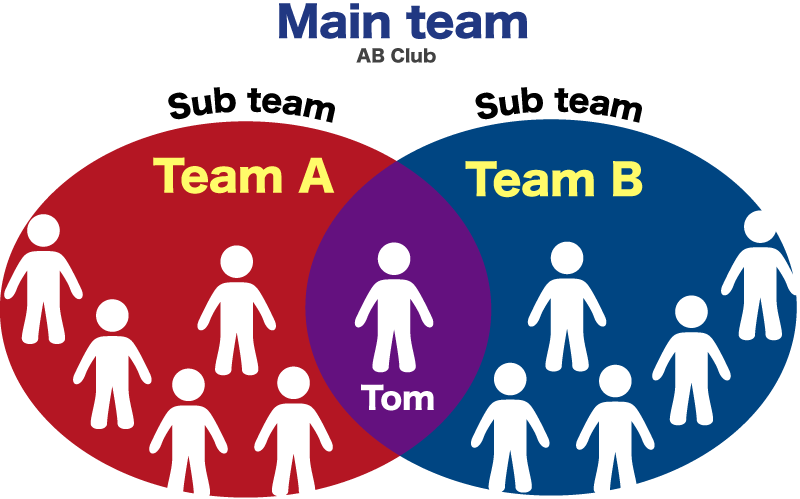
If there are multiple teams within one main team and one player may belong to multiple teams, add the sub-teams.
When creating stats for individual players, players can be treated as the same person even if they belong to multiple sub-teams.
For example, if Tom of the AB Club participates in both Team A and Team B tournaments, his Main team would be 'AB Club' and his sub-teams would be 'Team A' and 'Team B', and Tom could belong to both.
👉 How to name Sub-teams
For schools or club teams that have separate teams by grade level, it is helpful to include the year or graduation year in the sub-team name. This makes management easier when players are replaced after graduation.
However, if your team does not plan on keeping individual records, then just the main team will be fine.
Add Match
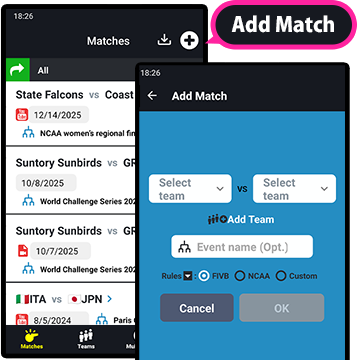
Open the match list from the Matches menu at the bottom of the app. You can create a new match using the button in the top right corner of the page.
When adding a match, you can choose the rules.
Supported rules are FIVB rules, NCAA rules, or Custom (a combination of FIVB and NCAA rules).
Specifically,
Libero serve allowed (FIVB:No / NCAA:Yes)
Substitution Rule 1
Players may enter and leave multiple times within a set. (FIVB:No / NCAA:Yes)
Substitution Rule 2
Free substitutions within the same rotation position. (FIVB:No / NCAA:Yes) * Substitutions are not fixed pairs — once a player has entered a rotation position, they may substitute with any player in that position
2. How to Log
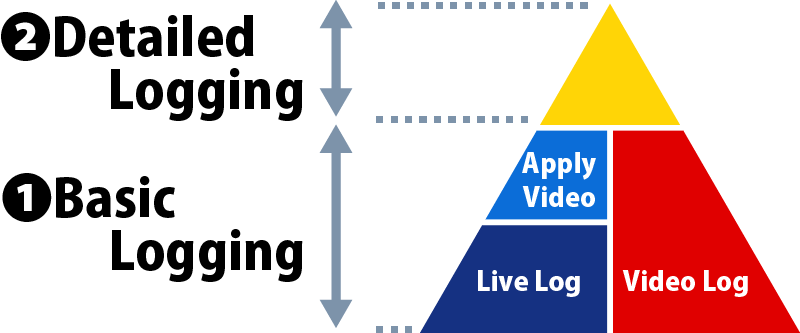
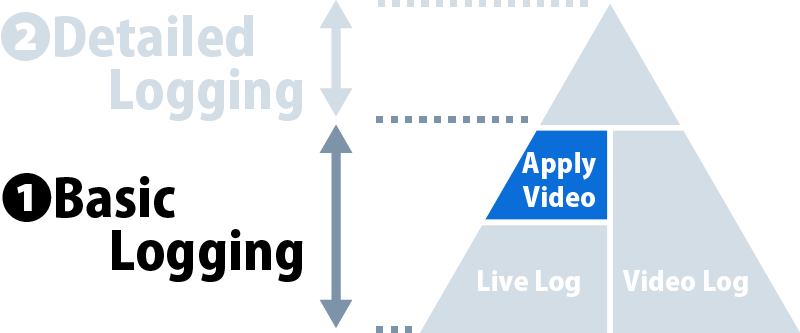
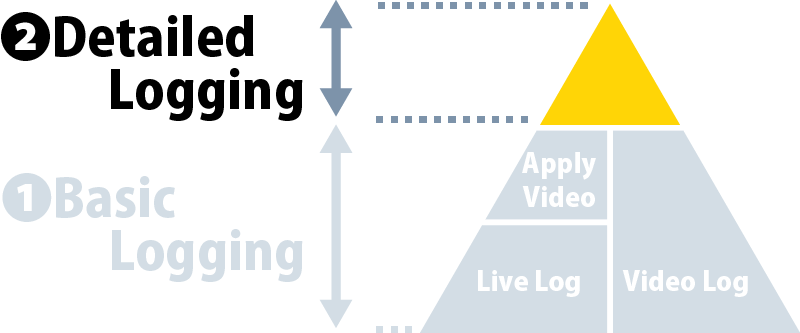
The logging process has two stages: Basic Logging and Detailed Logging.
Basic Logging has two modes: Live Log and Video Log.
A match video is required in order to proceed from Basic Logging to Detailed Logging.
❶Basic Logging
There are two ways to use Basic Logging:
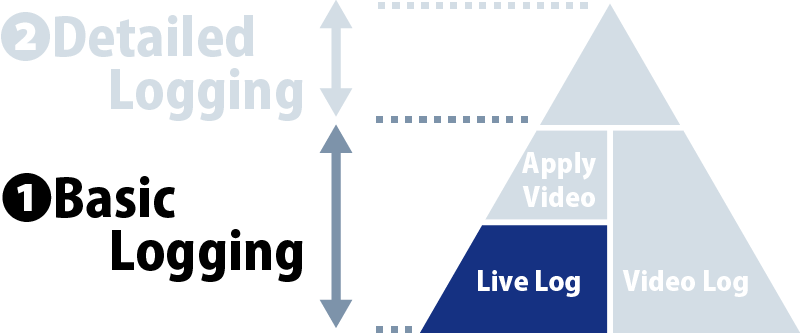
Watch the match live at the venue and log it Live Log
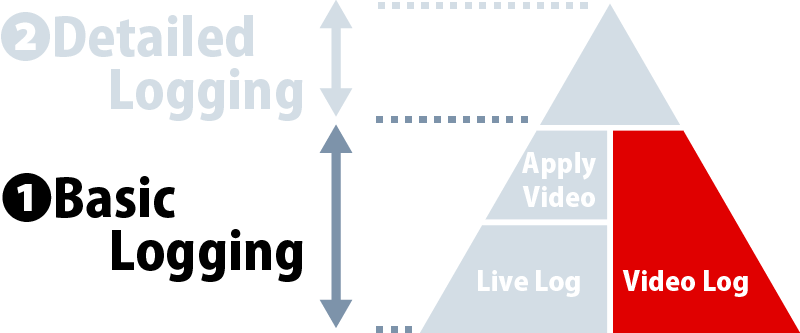
Play a video in the app while logging Video Log
The logging procedure is the same for both Live Log and Video Log.
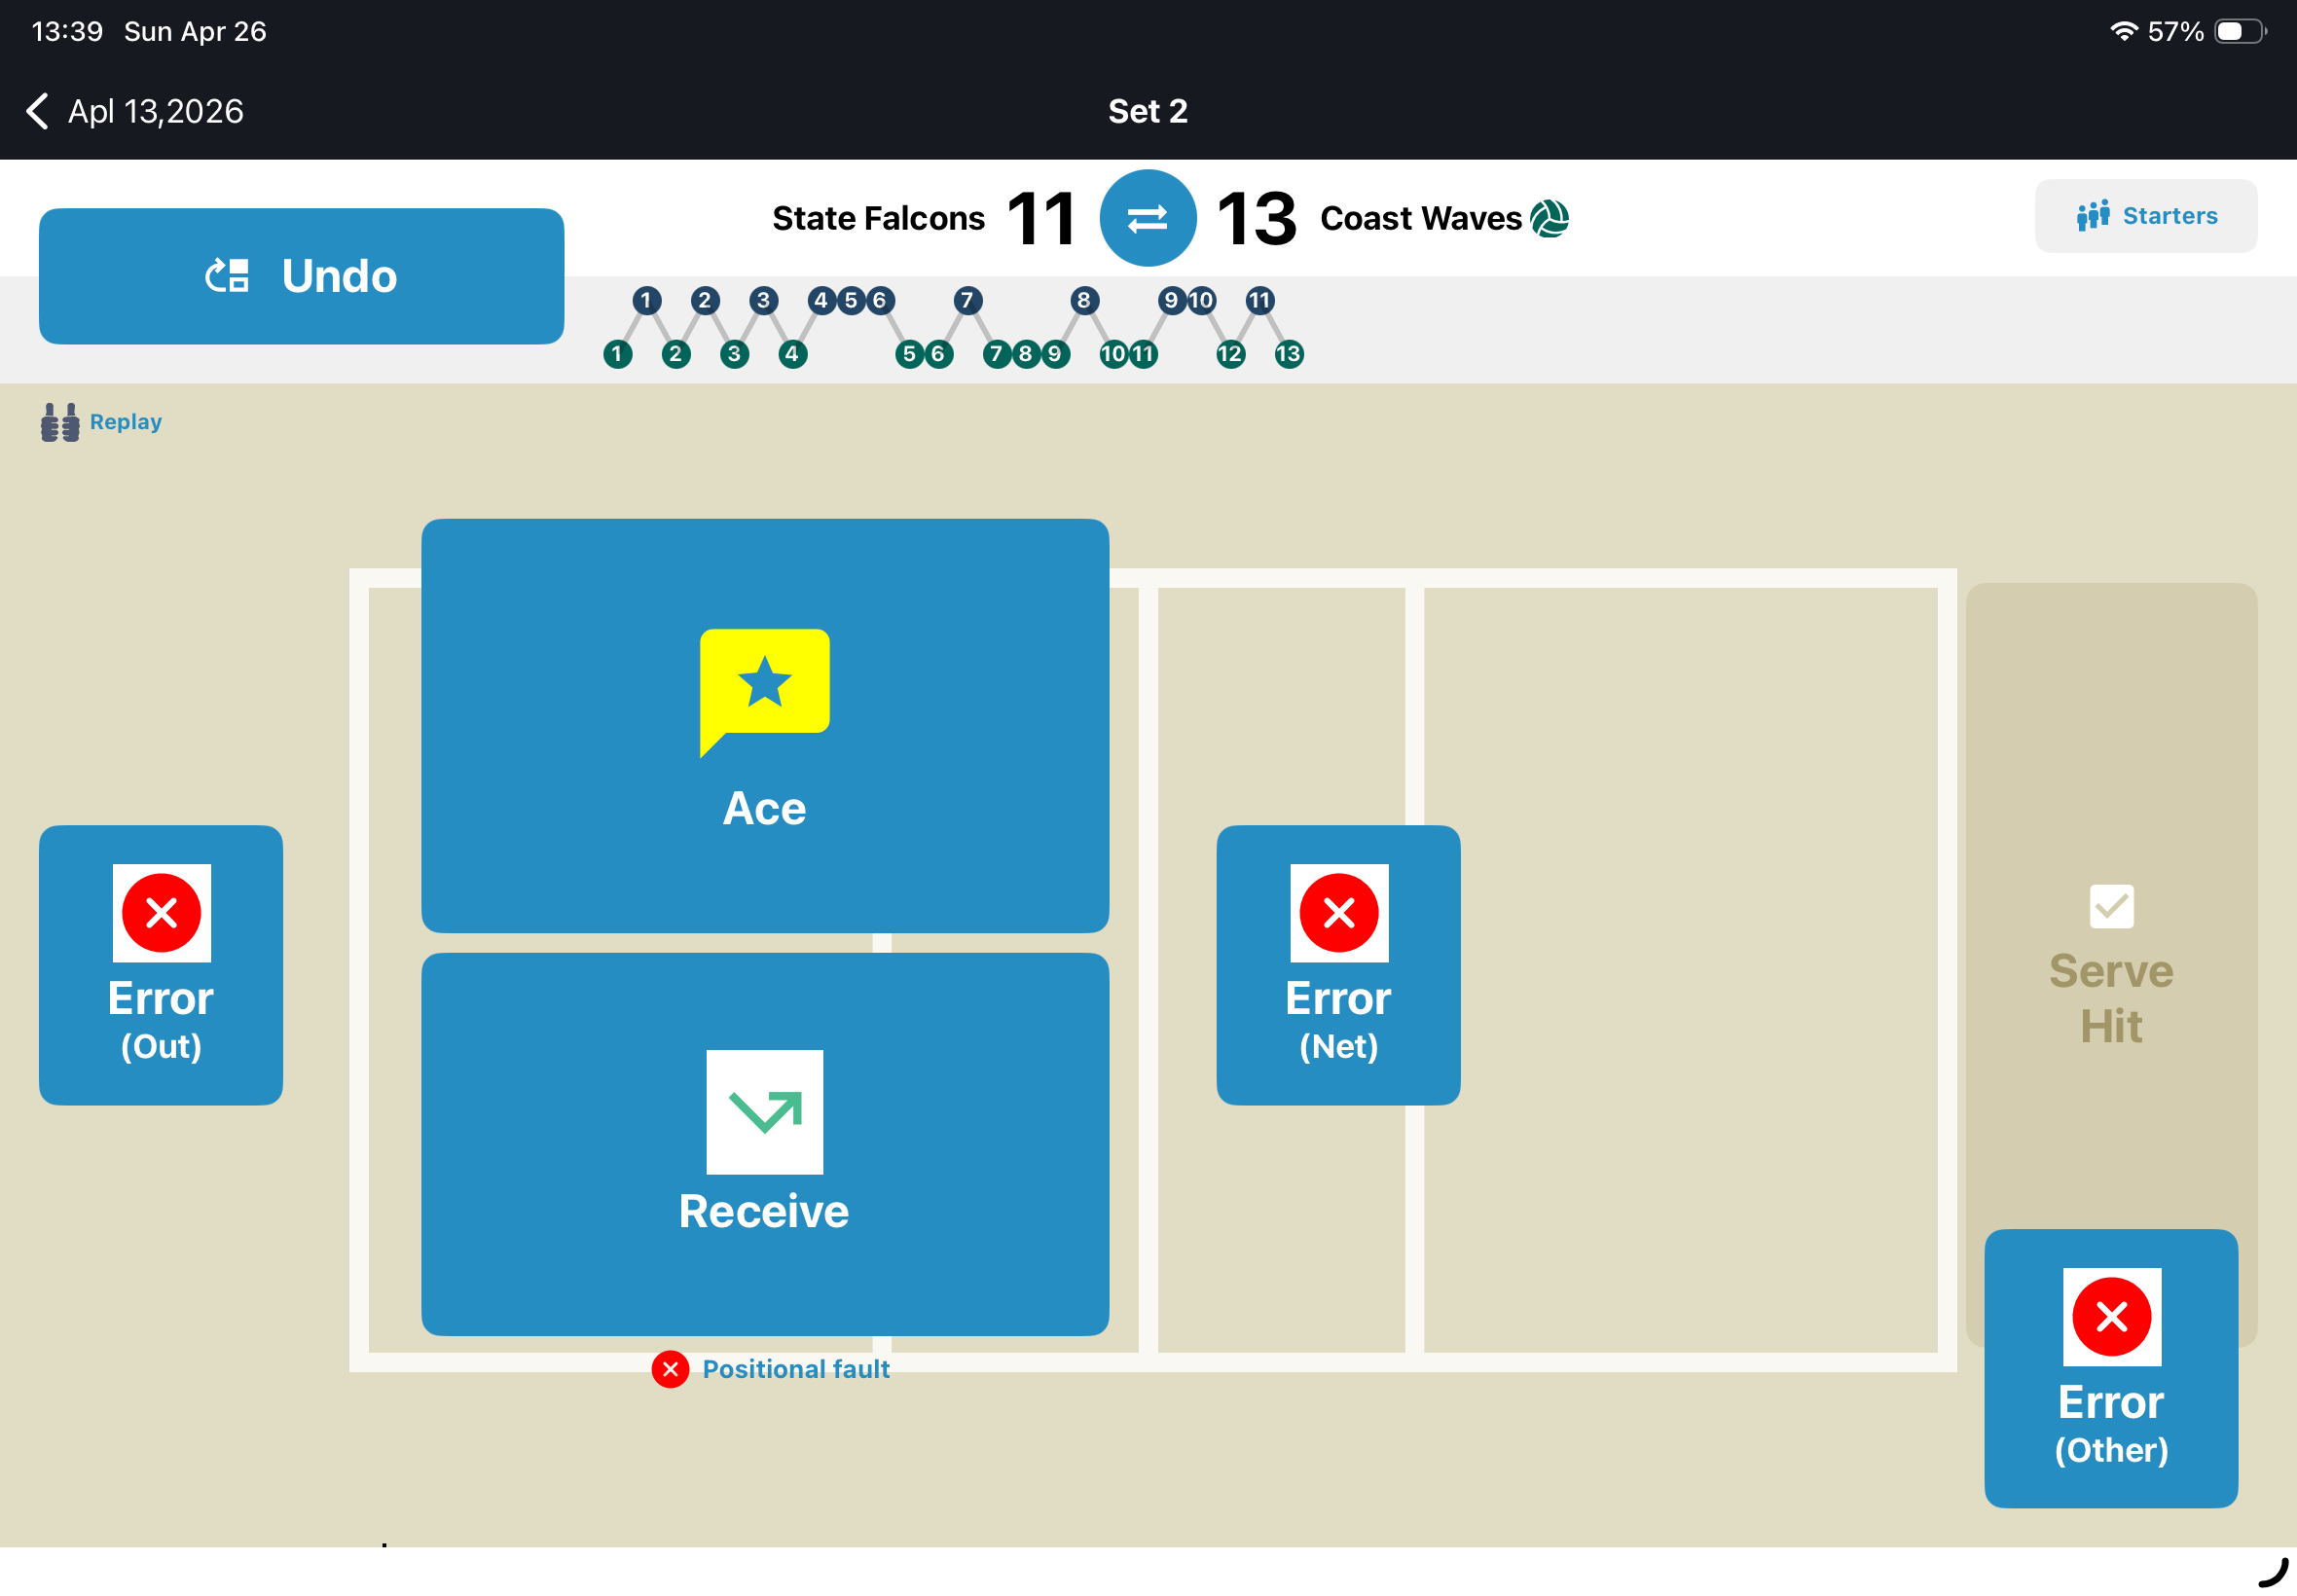
Buttons such as [Serve Hit], [Receive], [Attack], and [Kill] appear according to the flow of the match, so you simply tap them while watching the game.
Live Log: Immediately after tapping the [Serve Hit] button
The time when you tap each button is recorded in the background.
If you plan to apply a match video later to your Live Log and use Add Details, try to tap buttons such as [Serve Hit] as close as possible to the actual timing of the play. Doing so will make the later Apply Video step much easier.
- Basic Logging Live Log
- Basic Logging Video Log
A playback player for YouTube videos and video files is built into the app. You can adjust playback speed or skip ahead between rallies to log easily.
- Apply Video to Live Log
A match video is required to move from ❶Basic Logging Live Log to ❷Detailed Logging.
If a video of a match you logged with Live Log is later uploaded to YouTube or you obtain the video file, you can apply that video to the existing Live Log. The process is simple: just specify the time of the first serve contact in the video. This will place it in the same state as Video Log, allowing you to proceed to ❷Detailed Logging
❷Detailed logging
By logging the match while repeatedly playing the video in detail, you can add more detailed information to the data obtained through ❶Basic Logging.
Each play, such as serves and attacks, is automatically replayed in a loop, allowing you to calmly log players, directions, and other details while watching the footage.
If the time when you tapped buttons during ❶Basic Logging was slightly different from the actual play timing, the replay start time will also be offset, so you can correct that here as well.
3. About the match video
Match videos supported by Volley Analyst are public or unlisted YouTube videos, or video files stored on your device.
Storing many video files on your device requires available storage space, so please consider using YouTube videos.
If you logged a match using a video file and later upload that file to YouTube, please replace the video source specified for each set from the video file to the YouTube video. If the uploaded YouTube video starts at the same timing as the original video file, no time alignment is needed, and the video clip can continue to be used as they are.
The YouTube video display area inside the app includes a link for viewing the video on YouTube, and this link cannot be hidden.
4. Team Match Folder
Team Match Folder is a shared storage folder for match data that can be used collaboratively by Volley Analyst users and Volley Analyst Viewer users
Volley Analyst users can upload their match data from the app to Team Match Folder, and can also import match data uploaded by other users. This allows logging work to be divided among multiple users.
Volley Analyst Viewer users can import match data stored in Team Match Folder within the app.
Team Match Folder accounts can be created using Volley Analyst. To create an account, you must register an email address in the app and complete identity verification.
By sharing the created account (team login ID and password) with teammates, multiple users can share one Team Match Folder. You don't need to register your email address to join Team Match Folder.
- Changing Team Match Folder
If the creator of a Team Match Folder wants to create a new Team Match Folder, the current Team Match Folder must first be deleted and a new one created. In this case, other users who had joined the deleted Team Match Folder will be automatically removed.
Likewise, if the creator of a Team Match Folder wants to join a Team Match Folder created by another user, they must first delete their current Team Match Folder and then join the new one.
If a user participating in a Team Match Folder wants to join another Team Match Folder, they must leave the current Team Match Folder first and then join the new one.
In all cases, match data saved on your own device will remain unchanged.
- Expiration Period of Team Match Folder Data
Match data stored in Team Match Folder has an import availability period. This period is two weeks from the time of export. (The same as the expiration period for QR codes or import codes used for individual distribution.)
The import availability period cannot be extended, but you may export the same match again and store it in Team Match Folder.
To make the import period expire immediately, please use Stop sharing.
5. Share (Export)
Match data logged with Volley Analyst can be viewed in other Volley Analyst or Volley Analyst Viewer.
There are two ways to distribute match data:
・Store in Team Match Folder ・Distribute a share code individually
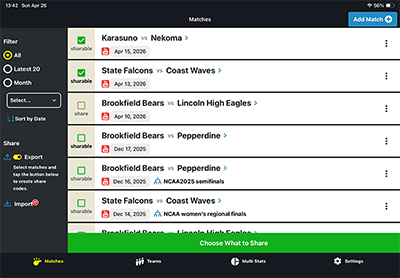
For either method, first open the matches page in the app, tap the Export menu item, and select the match you would like to share.
Select the match to share
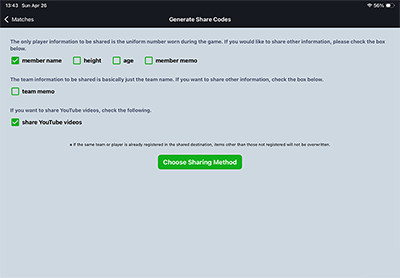
When you tap Choose What to Share on the screen above, you can choose restrictions such as whether to include the YouTube video or player names in the shared data. Please note that if a YouTube video is included in the shared data, recipients will be able to view it even if the video is unlisted.
Select share content
If the match data contains video files on your device, those video files cannot be included in the shared data. If you would like recipients to view the match with video, please share the video file with them using another route. You can also share the video file directly from the video source page in the app. The recipient can then apply the video to the corresponding match on their own device.
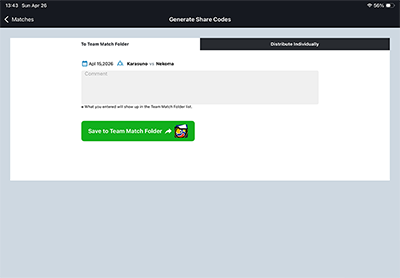
When you tap Choose What to Share on the screen above, you can choose between two tabs: To Team Match Folder and Share Individually.
Store in Team Match Folder
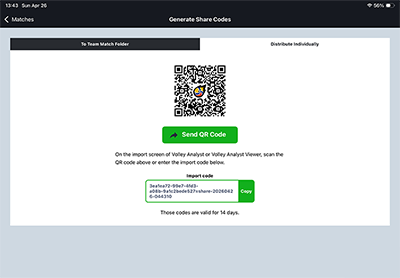
When you tap Share Individually on the screen above, a QR code and import code for sharing will be displayed. If you would like to send the QR code through another app, use the Send QR Code button.
Distribute a share code individually
- Shareable data
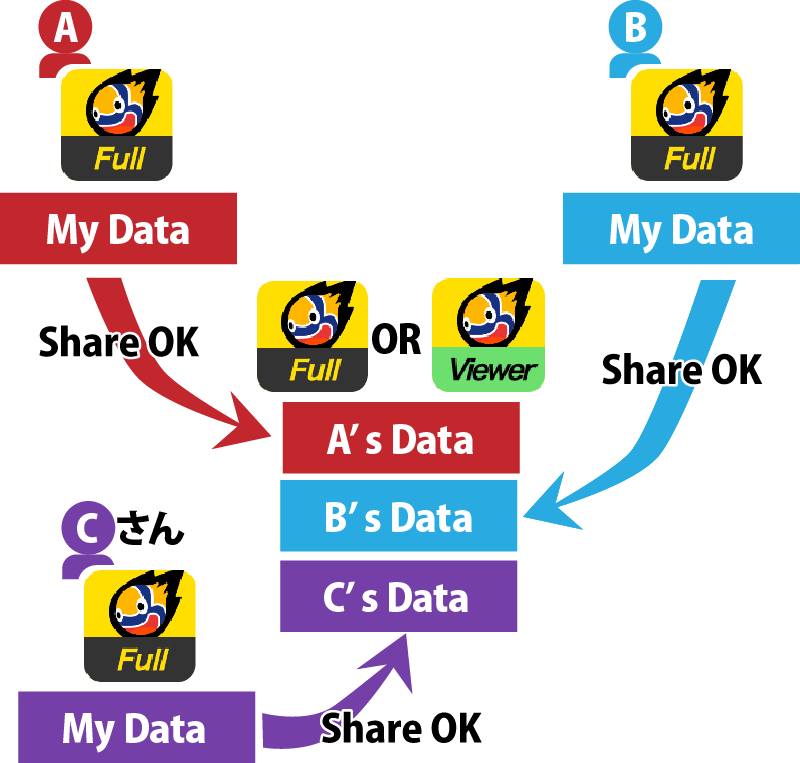
Only data that you originally created can be shared.
Match data obtained through sharing cannot be shared again.
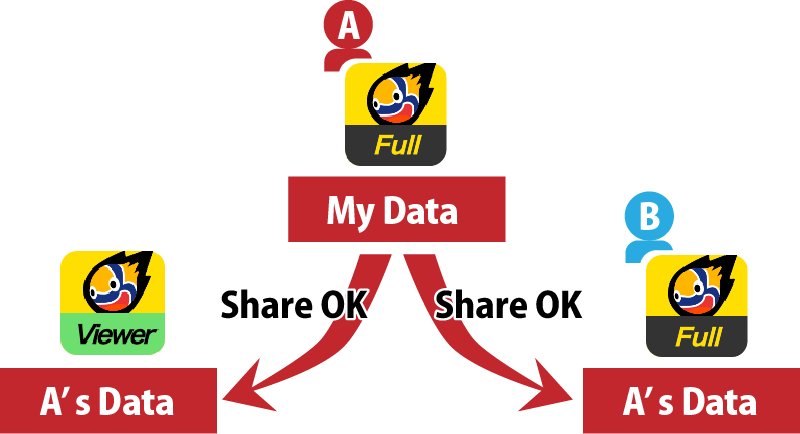
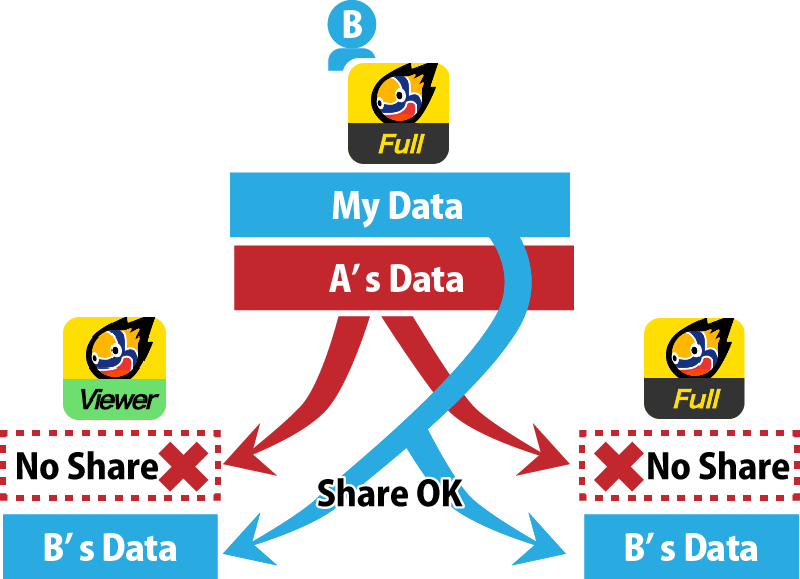
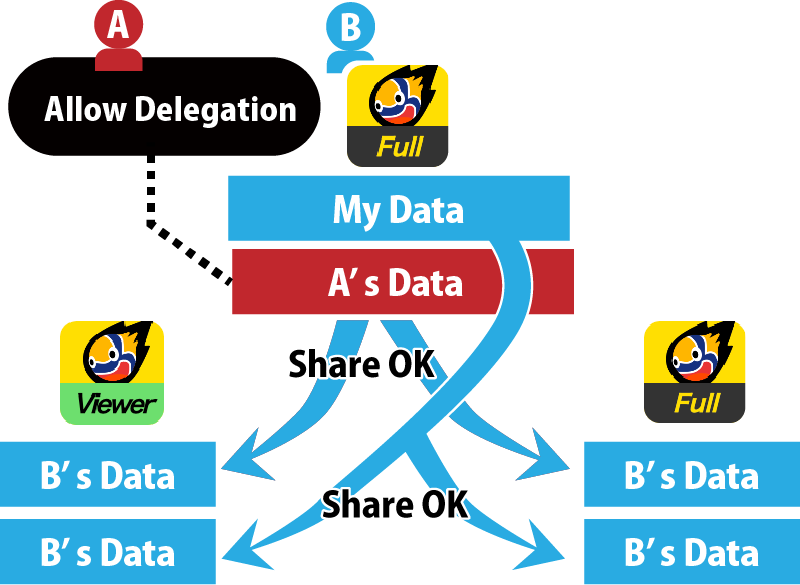
In Volley Analyst, imported match data can still be edited. However, as long as the original creator of that match data (User A in the example below) is someone other than yourself, it cannot be shared with others.
However, if the original creator of the match data (User A in the example below) has enabled Settings → Manage Shares → Delegation and checked Allow matches shared from this app to be further shared by recipients to other users, then sharing with a third party is allowed.
In that case, the shared data is provided as your own data (User B), not as User A's data. Therefore, if the third party wants to share that match data again, permission is required from User B rather than User A.
There is no limit to the number of recipients, whether using Volley Analyst or Volley Analyst Viewer.
※ Volley Analyst Viewer supports importing only. It does not have a feature to share data from your own device with others.
- Stop sharing
Deactivate shared QR codes
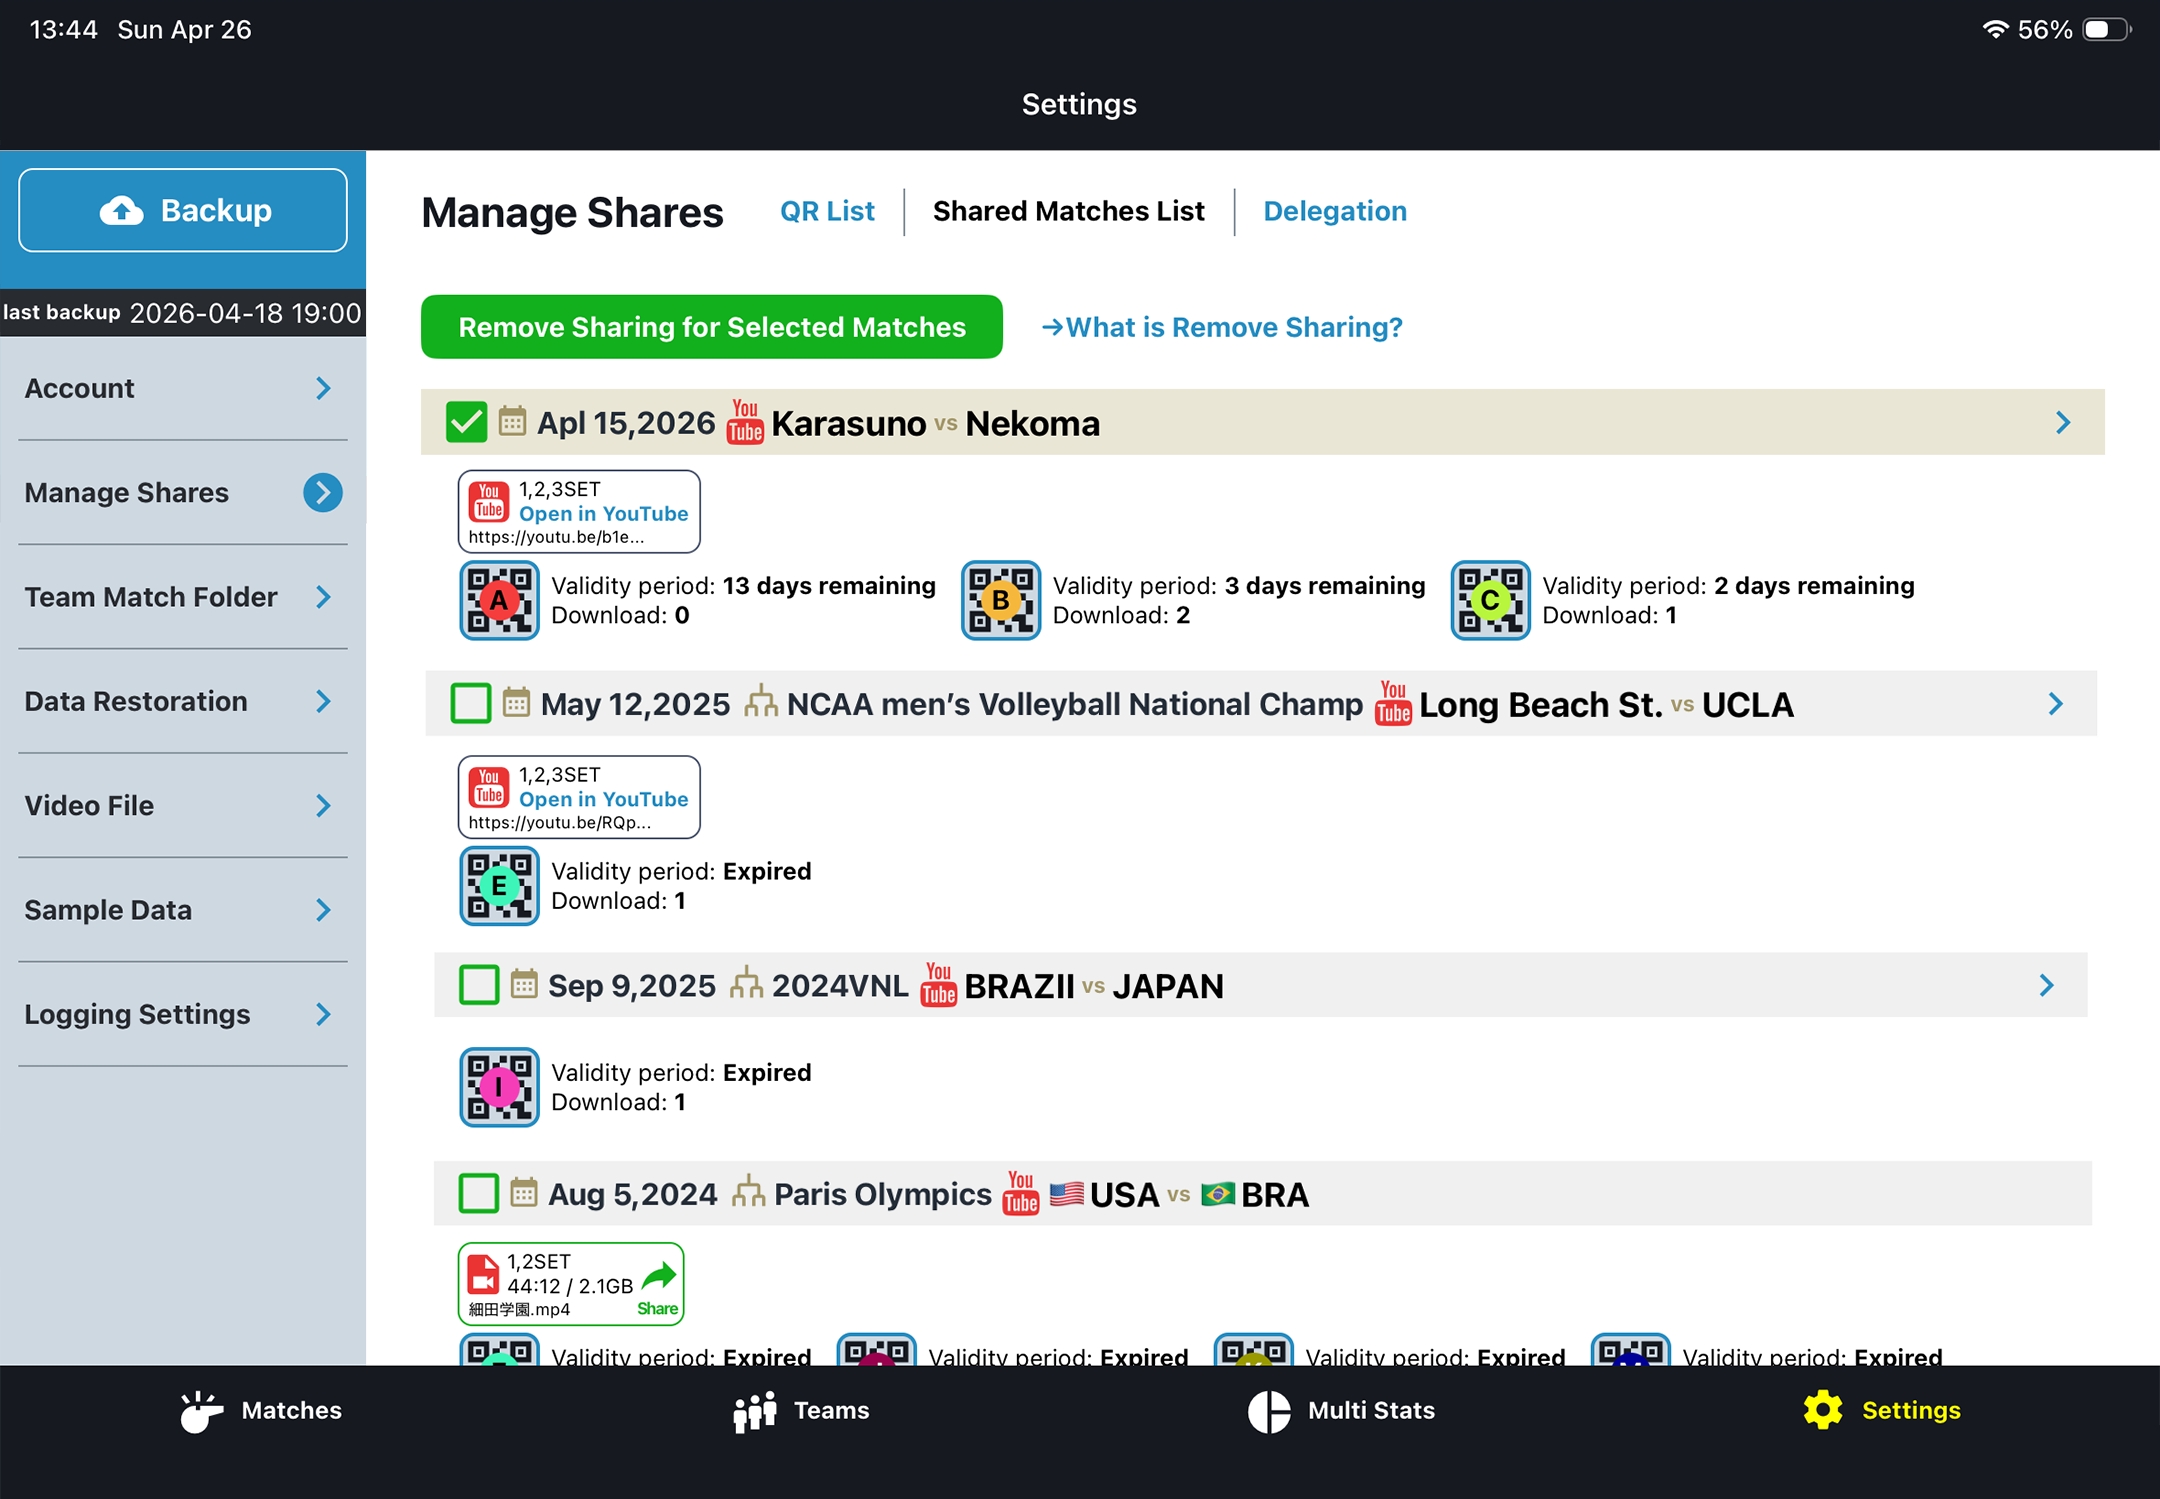
Shared QR codes automatically expire 7 days after being generated. If you would like to invalidate one immediately, go to Settings → Manage Shares from the bottom menu, tap the QR code icon, and use the Expire Now link.
Delete shared data
If you would like to remove match data that has already been shared from recipients' apps, go to Settings → Manage Shares from the bottom menu, select the match you want to remove, and tap Remove Sharing for Selected Matches.
After this, the next time an app that imported the match connects to the internet and is launched, that match data will be deleted from the app.
Delete shared data
6. Share (Import)
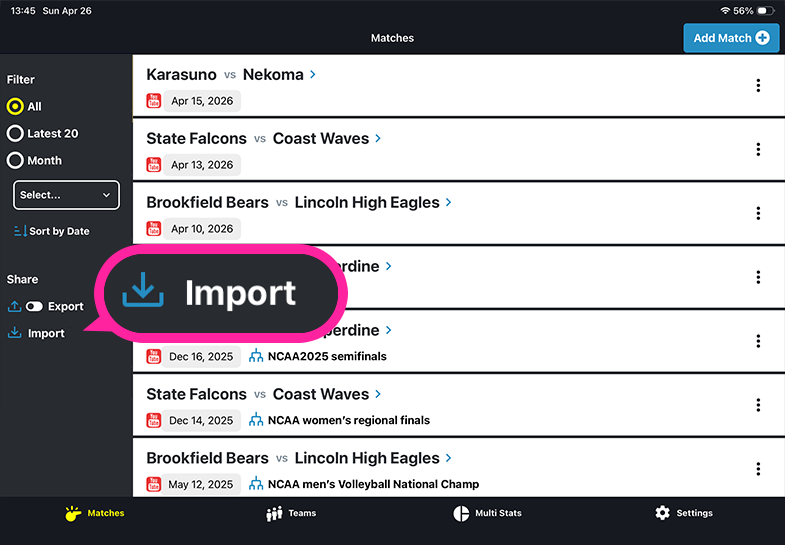
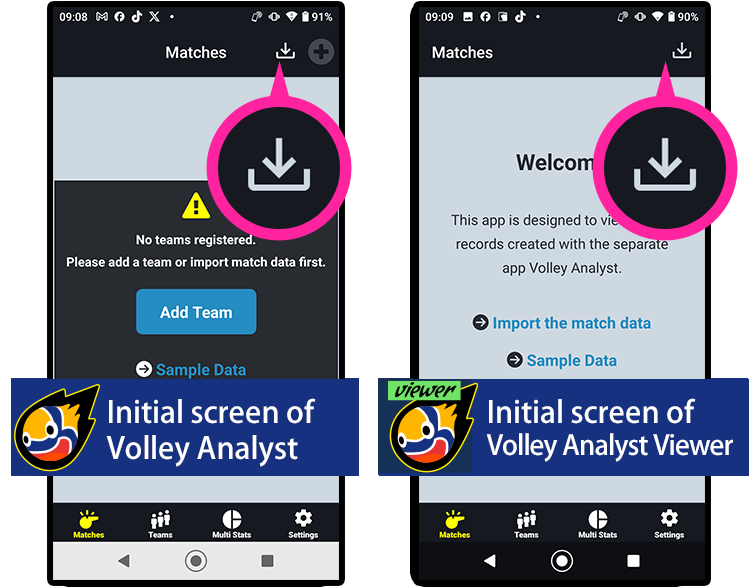
You can import from the left-side menu of the Matches screen shown when the app first launches. (On smartphones, use the icon at the top of the screen.)
Tablet version: Import from the left menuSmartphone version: Import from the top icon
There are two ways to import match data.
・Using Team Match Folder ・Using an individual share code
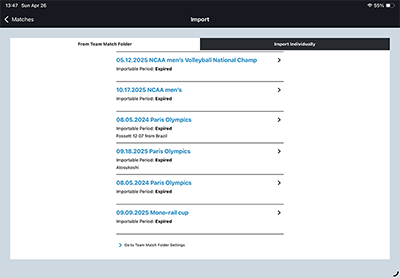
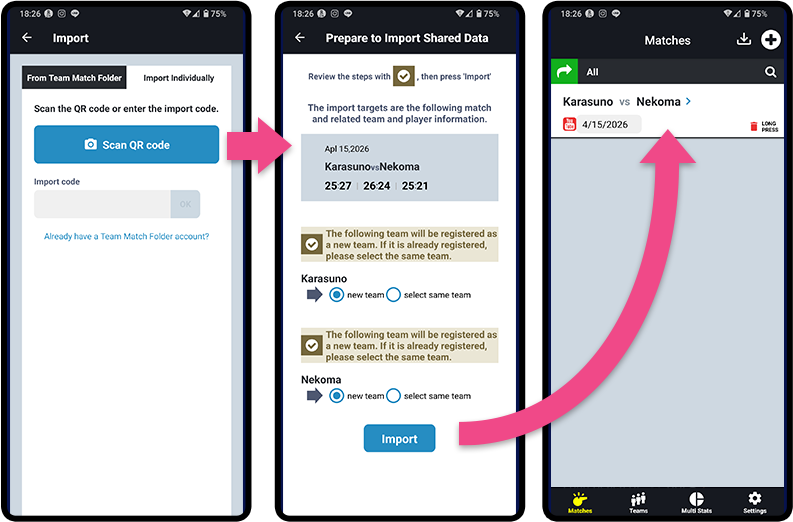
The From Team Match Folder tab on the import screen displays a list of matches not yet imported. ※ A team login ID and password are required to join Team Match Folder.
Import from Team Match Folder
If you deleted a match after importing it and would like to import it again, you can open Team Match Folder in a browser and import it using the share code for importing.
Information such as the Team Match Folder URL can be found from Go to Team Match Folder Settings at the bottom of the unimported list on the screen above.
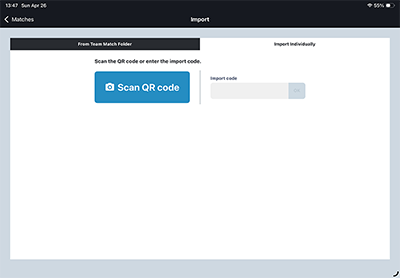
In the Import Individually tab on the import screen, you can choose either scanning a shared QR code or entering an import code.
Import Individually
With either method, a confirmation screen showing the import contents will appear. After reviewing the details, tap the Import button at the bottom to complete the import.
After reviewing the details, tap Import to add the match
7. CSV Download
Match data recorded in the app can be downloaded as CSV files.
Access the Team Match Folder in your browser and download the ZIP file for each export.
How to access the Team Match Folder in your browser
You can access the Team Match Folder in your browser from
the “View Team Match Folder” button on the
“Settings → Team Match Folder” screen in the app.
If you want to access it from another device such as a PC,
please use the URL displayed on the same screen.




 at the top of the screen.)